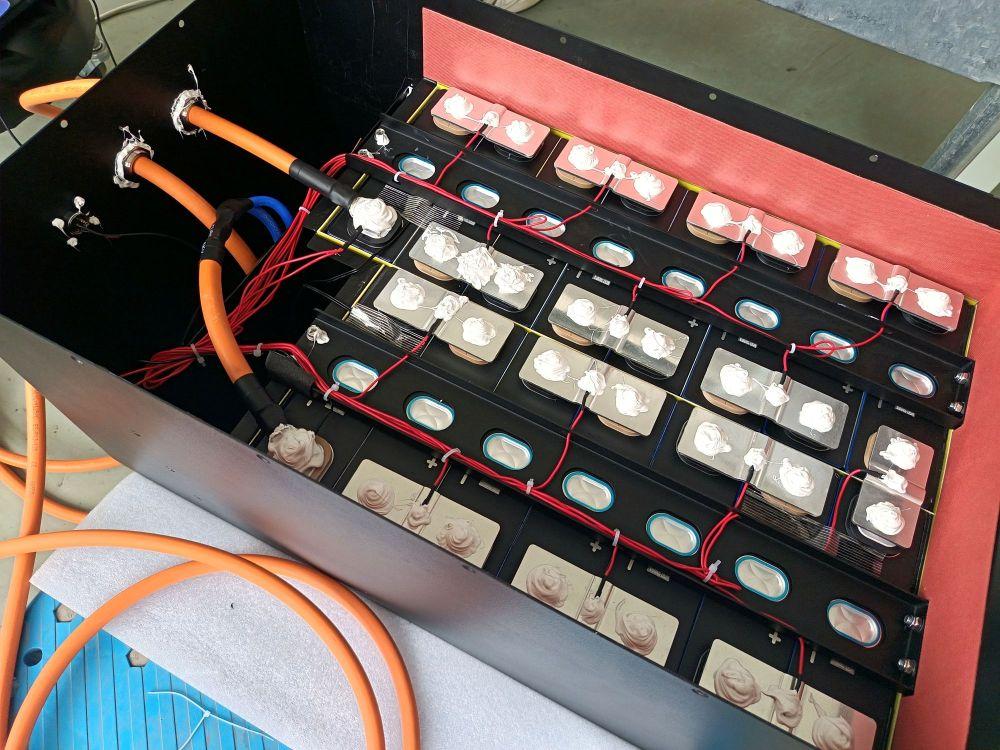
Constructing your own LiFePO4 (Lithium Iron Phosphate) battery pack is an immensely rewarding and practical project. Whether you're a DIY enthusiast, live off-grid, or need robust energy storage for solar, RV, or marine applications, mastering this skill is invaluable. This comprehensive, human-written guide provides a detailed walkthrough on how to build a safe, high-performance LiFePO4 pack designed to maximize longevity.
First, it's crucial to distinguish between the basic building blocks and the final product:
LiFePO4 Cell: A single unit with a nominal voltage of 3.2V. Each cell has a specific capacity (Ah) and can be used alone for very small applications.
LiFePO4 Battery Pack: A configuration of multiple cells connected in series, parallel, or a combination of both. This assembly determines the pack's total voltage, capacity, and power output.
Think of it like building with LEGOs: the cells are the individual bricks, and the battery pack is the completed model.
The configuration of your cells dictates the pack's performance:
Series Connection (For Higher Voltage): Connect the positive terminal of one cell to the negative terminal of the next. The voltages add up, while the capacity (Ah) remains that of a single cell.
Example: Connecting four 3.2V cells in series yields a 12.8V pack.
Parallel Connection (For Higher Capacity): Connect all positive terminals together and all negative terminals together. The voltage remains the same, but the capacities add up.
Example: Connecting four 3.2V 100Ah cells in parallel yields a 3.2V 400Ah pack.
Most practical applications use a hybrid configuration. For example, a 4S4P pack (16 cells: 4 in series and 4 in parallel) would deliver 12.8V at four times the capacity of one cell.
Step 1: Gather Your Materials and Tools
You will need:
LiFePO4 cells (quantity based on your voltage & capacity requirements)
A suitable Battery Management System (BMS)
Connectors: bus bars, nickel strips, or heavy-gauge wire
Insulated wiring, heat shrink tubing, and terminal protectors
A protective battery case or enclosure
Insulating pads and spacers
Tools: Multimeter, soldering iron or spot welder (for nickel strips), screwdrivers, and personal safety equipment (gloves, goggles).
Step 2: Plan the Layout and Arrange the Cells
Finalize your series/parallel configuration first. Arrange the cells securely in a battery holder or with non-conductive spacers to prevent movement and short circuits. Double-check the polarity (+/-) of each cell before making any connections.
Step 3: Connect the Cells
For series connections, link the positive terminal of one cell to the negative terminal of the next.
For parallel connections, join all positive terminals together and all negative terminals together.
Ensure all connections are firm, secure, and have minimal resistance. Loose connections can lead to overheating, inefficiency, and failure.
Step 4: Install the Battery Management System (BMS)
The BMS is the critical "brain" of your pack. It:
Protects against over-charging and over-discharging
Monitors temperature and current
Balances the voltage across all cells to ensure uniform performance
Carefully connect the BMS to each cell group (balance leads) according to the manufacturer's diagram. An error here can damage the BMS.
Step 5: Final Assembly and Securing the Pack
Place the connected cells and wired BMS into your chosen enclosure. Use insulation between cells and layers to prevent any chance of a short circuit. Secure everything with padding or brackets to minimize vibration. Once sealed, your pack is ready for testing.
Voltage (V): Determined by the number of cells in series (e.g., 4S = 12.8V).
Capacity (Ah): Determined by the number of cells in parallel (e.g., 4P = 4x individual cell Ah).
Energy (Wh): Voltage × Capacity (e.g., 12.8V × 100Ah = 1280Wh).
Cycle Life: A key advantage of LiFePO4 chemistry; quality packs can achieve 2,000–5,000+ charge cycles.
Max Continuous Discharge Current: Defined by the limits of your cells and BMS.
Accurate Specifications: The pack delivers its rated voltage and capacity.
Robust BMS: Must include essential protections (over-voltage, under-voltage, short-circuit, over-temperature).
Superior Build Quality: Features clean wiring, strong mechanical connections, a solid case, and excellent insulation.
Proven Longevity: Look for cells and packs with a verified high cycle life (3,000+ cycles).
Positive Reputation: Choose components with good user reviews and independent test data.
Temperature is Key: Operate between 0°C to 45°C (32°F to 113°F). Store in a cool, dry place, ideally between -20°C to 25°C.
Mind the Charge Rate: Avoid extremely fast charging unless explicitly supported by your cells and BMS.
Trust the BMS: Allow the BMS to balance the cells; unbalanced packs degrade rapidly.
Smart Storage: If storing long-term, leave the pack at a 50% state of charge.
Avoid Extremes: For the longest service life, avoid regularly discharging to 0% or charging to 100%; keeping between 20% and 80% is ideal.
Omitting the BMS: This is a critical safety hazard that risks fire and cell damage.
Loose Connections: Cause high resistance, voltage drops, heat generation, and potential failure.
Reverse Polarity: Connecting a cell backward can instantly ruin it and is dangerous.
Thermal Damage: Applying too much heat while soldering can permanently damage cell internals.
Insufficient Insulation: Exposed terminals can lead to short circuits.
Building a custom LiFePO4 battery pack is a project that offers great satisfaction, significant cost savings, and a tailored power solution. By prioritizing careful planning, using quality components, and adhering to strict safety protocols, you can create an energy storage system that delivers exceptional safety, reliability, and cycle life for years to come.
Next:Sungrow Donates Inverters to Brazil's Unicamp to Support Solar Energy Research